Sunday, October 18, 2015

Updated Kiwi Lane Storage Photos?

I've been asked by several(many!!!)  people both Online and in my "Scrapping World" if i have any updated photos of my Kiwi Lane Fused Storage Binder.  And I am HAPPY to say Yes!  And i can't wait to share them with you!  But first....i have take Photos!

I just wanted to come and post here on my blog that i did have more photos of my "Storage Binder". I still have some to do....but they are all mostly in my book.  Thank you everyone for "Pinning" it on Pinterest!

Expect photos this week....i would do it right now, but it's 9:40 on a Sunday....and i'm working on another project.  But I have to say that I REALLY do love having my Kiwi Lane Designer Templates organized this way.  Much easier to take to Crop and Retreats!

Thanks again for Pinning!  AND if you ever need to order more Kiwi Lane Designer Templates, Ink, Paper OR a new Idea Book (Volume 2???) I'd love to help you out!

Here's a link to my Kiwi Lane Facebook Page. Here I share all of my Kiwi Lane Projects, Specials and MORE!

Jill

Sunday, October 11, 2015

Sharing a NEW Kiwi Lane Designs Layout! But it's not of my cat...

Yes. You read that right!  I scrapbooked a layout of a cat.  The cat isn't mine.  He is cute though, and i did take the photos! 

A few weeks ago my daughter was asked to babysit a cat and her little sister.  

I was "allowed" to go over and visit with the cats, because, well...i AM a crazy cat lady! lol 

So one night when i went over to "visit" i decided to take some photos of lil' bit (the cat whose photos are scrapbooked) and i decided that i would make a scrapbook page about her! :0)  Please note...i never once, saw the other cat.  But I knew she was there!  Somewhere! 

For this layout i used the "Riley" Collection from Bella Blvd.  I LOVE Bella Blvd.  ALL of there papers are beautiful!  Here's the layout: 


Now if you look at the layout you might notice that something isn't quite right.  The background papers don't match.  Well, actually they do...but they aren't used like usually use them.  Understand?  I decided to make this layout a little bit backwards, and topsy turvy.  I made the top left and bottom right borders match, and then i made the bottom left and top right borders match.  I also LOVED that cat background papers so i had to use it...but i found out i was short by "one" piece.  It always comes down to that ONE piece! lol.  So what did was i used a different piece of paper for the left side and a different piece for the right side. Even though I didn't match everything exactly i LOVE how it turned out!.  

In addition to the Riley Papers, i also used the Sticker Accessory Sheet to add more details to the page.  

Do you like the bow?  I made it using my Envelope Board Punch from We R Memory Keepers! Super Simple way of making bows for layouts! 

Hope you like my layout!  

P.S....yes...I used my Kiwi Lane Templates for the layout too!  And YES.....I sell them!  If you'd like to purchase some just let me know!  I'd LOVE to help you out! 

P.S.S....if you need to you can contact me via email:  Jill_75013@yahoo.com


Have a great day!  

Jill

Tuesday, August 18, 2015

My last post was in May????

I can't believe that my last post was in May! 

Either I've been VERY busy.....or Very Lazy! 

I think I'll go with busy! 

With what you may ask???

This! 


For the past few years I"ve been making a Christmas Album to teach as a Class. 
And well...this year I took it a "little" bit further. 
I made it a Kit! 

Want to see more photos? 


Yes....I know it's only August
But face it...Christmas is coming! 

I've still have a few kits left...in my Etsy Store. 
I even have ONE made....for purchase of course. 
(I thought i would make one, just in case someone wasn't really a scrapbooker, but wanted one)
All you have to do is go up to my Etsy Store link
Choose the Kit....or the Pre- Made Album
And it will be on it's way to you! 

Instructions will be emailed. 

Thanks for reading this! 

Jill 


Thursday, May 21, 2015

Two...okay, Three New Projects (Yes, Kiwi Lane was used)

So i'm just now really getting back to myself.  And well, I thought that I'd just post a few projects that I've been working on....these are on display at Scrappin' Goodtime in Corsicana.  So....if you're in the area you can stop by and see them in person (so much prettier in person!)

Here's a Card I made using KaiserCraft.  I used the Betsy's Couture Collection...and yes, that's the Banner Template from Kiwi Lane (see...i had to use it!) and then I made a rose using the Tim Holtz Tattered Pinecone Die.  (I seriously LOVE that die!)


Here is a two page layout I made again using KaiserCraft.  (Yes, I do LOVE KaiserCraft too!)  This Collection is called "Oh So Lovely" and it truly is!  And yes... i used my Kiwi Lane Design Templates on this layout too! (and again I also use the Tattered Pinecone Die...see i can use it on LOTS of projects!) 


and yet again, another layout using the "Oh So Lovely" Collection from KaiserCraft.  Notice that i Some scrapper's think you can't put a banner on a boy layout....i don't know why!


Now I"m off to begin working on my NEXT project!  This time I'll be using the "Little One" Collection from...you guessed it!  KaiserCraft!  

Happy Scrapping! 

Jill

Monday, May 11, 2015

I'm "Fusing" My Kiwi Lane....

**** Updated Blog Post with More Photos can be found here: http://brought-to-you-by-the-letter-j.blogspot.com/2016/01/more-photos-for-my-kiwi-lane-designer.html


Last week on Facebook I wrote on my Wall that I was re-organizing my Kiwi Lane Designer Templates.

Let's face it...what I was using wasn't working for me. Yes...the photo below is a plastic container filled with Kiwi Lane Templates.  (Not all of them....but some!).  It just really wasn't working for me and i had to find a solution. (This is the photo that I posted to Facebook)


I knew there was a better way for me to organize my Kiwi Lane Templates, I knew what I had to do, and I knew that it would take me some time to complete.

I thought what would be the easiest, most portable way to organize my templates?

Well, the first way would be the Design Tray that Kiwi Lane sold. I always had high hopes of being able to afford a Design Tray...especially when I first started to collect my templates.  But a friend of mine who purchased the tray said that it wasn't really portable, that it was too big, and that the tray needed a lid to go over the top in case it toppled over in your car on the way to a Crop or Convention.

The second idea I had was peg board.  Well, peg board would work at home, but it wouldn't be very portable! (lol...everyone would see me coming though!  Hey, look! there's Jill with her Kiwi Lane Templates!).

The Third idea that i had was a binder.  I thought all along that binder would be a good idea! (yes...before the peg board, but you have to explore every avenue!).  But just using regular page protectors really wouldn't work because the templates would get all jumbled up...and i really wanted to get away from the metal rings.  So i tried my soldering iron to make customized page protectors for my binder...and it worked.  For awhile!  BUT THEN I FOUND!

The Fuse.


Okay, this isn't a review of the Fuse, but I just had to share that I LOVE the Fuse!  The Fuse worked so much better on the page protectors than the Soldering Iron.  The iron would melt the page protectors to the point of where sometimes they would look like they were tearing.  But the "Fuse" fused the page protectors together at the just the right temperature.

So now that you know what I used....how about seeing how my templates look?


Now you have to know this...I"m not done yet.  Hopefully I will be done by the end of this week (I ran out of Page Protectors).  I'm going to post a followup post to my blog with my completed project...which includes tabs on the side so that I know what template set is where...and they are organized by the "type" of Template.  Please note...I"m sharing "some" of the photos.  I have a lot more of 12 Inch Templates in the binder than what is shown and  to post photos of each of them would just be repetitive, for now, what you see is a "Sampling".  Same goes for the Accessories.  But after the project is completely complete I'll post more photos of the "Project"  (this weekend, hopefully!)

After starting my project I thought what could I have done to make it even more convenient of me?  Yeah, I should have put them in alphabetical order....but i didn't.  But look at them!  They are organized!  And I'm happy!

Enjoy!

Jill

Tuesday, April 21, 2015

Sharing Class Info!

Just thought I'd come and share some class info with everyone in BlogLand!

This year for National Scrapbooking Day I will be at Scrappin' Goodtime in Corsicana, Texas.  I'll be teaching a Travel Waterfall Album using Maya Road Products.

Here's the Info!
National Scrapbooking Day Class
Scrappin' Goodtime
200 N. 15th Street
 Corsicana, Texas

Travel Waterfall Album
Friday, May 1, @ 4:00 p.m.
or 
Saturday, May 2, @1:00 p.m. 
$30.00


Come make this very cute Waterfall Album with a travel theme. The front paper is a general map with an airplane paper clip, bicycle charm and chipboard camera. It's the perfect size to carry in your purse or sit on a desk so you can share your vacation photos with others. There are 8 flips which will hold up to 17 photos and/or use some for journaling. The basic tools you will need to bring to the class are paper trimmer, scissors, scoring tool, corner chomper (stub/deco), ink, wet glue (glossy accents), adhesive, and crop-a-dile.
Each class will be limited to 8, so call early to reserve your spot.


Call and Sign Up Today! 
(903) 641-0855
Have a Great Day!


Wednesday, January 28, 2015

All Good Things Must Come to an End...

That's true.

The End of Vacation.
The End of a Hot Fudge Sundae.
The End of a Movie.
The End of a Book.
The End of a Date.
The End of a REALLY good cup of Coffee.
The End of a Nap.
The End of ....well. You get it.

All Good Things Must Come to and End.

And with that being said, my Design Team Term with Kiwi Lane is Ending....in exactly TWO days to be exact.

It's been a LOT of  Fun! And I've really enjoyed the time I've spent getting to know the other ladies on the team.

And I knew that my time was coming...and now it's here.  So yeah....I'm a little sad.

Kiwi Lane will always be one of my MOST Favorite Tool Manufacturers!  And yes, I do use them on my own layouts and projects.  Which is what I think made me enjoy being on the team even more! SO with that being said, I think I'll post some of my favorite Kiwi Lane Projects! These are only a few!  I'll be adding more into my Kiwi Lane Designs Gallery Tab (located above) in the very near future!


Saturday, January 17, 2015

Warning, Warning, Under Construction.....


So I've decided to change things up around here this year.

I thought it was about time that I had my Blog connected to my Scrapbook Resume', connected to a Gallery (photo album more or less) of some of my favorite projects.

What does all this mean to you?

Well, nothing really lol.  Just really means that you'll be able to see what I've done in the past, and what NEW Projects I"m up to.

It's all about change!

Change can be good.  Sometimes.....and well to be honest Change can be hard!

But it's a Creative Challenge for me to have everything all in one place...and it's going to make things SO much easier too!


Jill


Thursday, December 04, 2014

It's Beginning to Look a Lot Like Christmas!

It's beginning to look a lot like Christmas!  Not only in the shops and the decorations but also in my scrapbook room.  I LOVE Christmas. From Shopping, to wrapping, to Christmas Cards, to December Journals to well...EVERYTHING! 

Hello December!  I hope that you and i can get out act together this year!  lol

With Christmas SO close I thought that I would share a layout that I created using the Kiwi Lane Design Templates!


The layout that I created for this month's project is from a Christmas Past.  2011 to be exact.  You can't see the journaling  because, well, it's hidden.  But the story behind the photo more or less is my family went to the Texas Gaylord to see the Ice Exhibit.  It was COLD!  Really COLD!  Which is why we all had on these big giant Parkas! But I caught this photo of my daughter and my husband smiling.  And well, it was the perfect photo for this layout.  I hope you like it! 

To create this layout I used several different sets of Design Templates from Kiwi Lane.  I also used the "Times & Seasons"  Paper Collection from Echo Park as well as a sheet from the "For The  Record" Collection from Echo Park and a sheet of Specialty Cardstock from Bazzill.  (LOVE Bazzill, especially their Dotted Swiss Paper, which is NOT what I used, but I wanted to give a shout out to it anyway!)

Here is a list of the templates that I used to create my page:
Mini Abbie Road 1A
Scallop 1A
Tiny Tags 1A
Cedar Trails 1A
Winter 3
Christmas 2
12 Inch Strips


Now, let me tell you about the design of the layout.  I created the back ground using the Scallop, the Cedar Trail, and believe it or not the Mini Abbie Border.  I'm sure that you can tell where I used the Scallop and the Cedar Trail, but what about the Mini Abbie?  I"ll help you out!  I used it for the border underneath the tree.  I actually only used the 1A Template for the entire 12 inch length by tracing it the way it appears on one half of the paper and then I flipped it over, matched up some areas and traced it on the remainder of the paper. I love the way it turned out.  I usually do things by trial and error anyway, and well, this one worked out for me! :0)

Also, if you notice at the bottom of my page...it's not a straight edge.  I decided to use the Cedar Trail Designer Template set and make it not so straight! :0) I LOVE the way tgit turned out and will most likely be doing this on more pages in the future! 

For the tree I traced the Christmas Tree Template three different timehts and shorteneed the width each time. I then embossed each section of the tree, inked the edges and the embossed dots.  Then I layered the trees and used pop dots to add dimension. Here's a SUPER close up photo of the tree. (The white border on the left hand side of my page is actually the background of what I take my photos on...the Christmas Tree is right there, exactly on that edge).

 The upper right hand corner of the layout needed something and i thought adding the holly leaf and berries was perfect! 


 And what would a layout be without having a banner on it, even if it's at the bottom of the layout?  Well I added one!  Because just like the Scallop Border Template I LOVE the Tiny Tags 1A Template!  I use those to in my layouts alot! 


I hope you enjoyed my project for this month. I LOVE creating things with the Kiwi Lane Designer Templates! Even though this is a Christmas Layout you can change a few things like add a ghost or a pumpkin where the tree is, take away the Holly and Berries, add something else there and add a "BOO" to the Banner for a Halloween Layout.  The possibilities are endless~ 

Be sure to stop by the Kiwi Lane Designs Blog and Facebook Page for MORE ideas on how to use the Kiwi Lane Designs Templates!  And remember, to shop early for YOUR Christmas Present! (Kiwi Lane Designs has a few things in their Shop that I wouldn't mind having! )

Merry Christmas! 

Tuesday, November 04, 2014

The Holiday Season is Approaching!


Yes, the Holiday Season is approaching and it's going to come full force whether you are ready or not!  

But that's okay, I'm ready!  Well, I say I am now, but when I wrap my packages for Christmas there is one item that I'm always on the hunt for.  Gift Tags.  But why shop for them when you can make them yourself with the help of Kiwi Lane's Designer Tag Templates! 

Tags are Fun and they are easy to make too!  I LOVE tags! Tags are like little scrapbook pages that can be made over and over really fast and they can be used on a variety of projects.  AND if you want, tags can be made for gift giving too!  So this month I made Gift Tags! 

You can make a Gift Tag easily with the help of the Kiwi Lane Designer Templates.  AND you can make them for any occasion!  Birthday, Holiday, Just Because and many more!  All you need to do it pick a tag, pick an accessory template and then get to work decorating.  

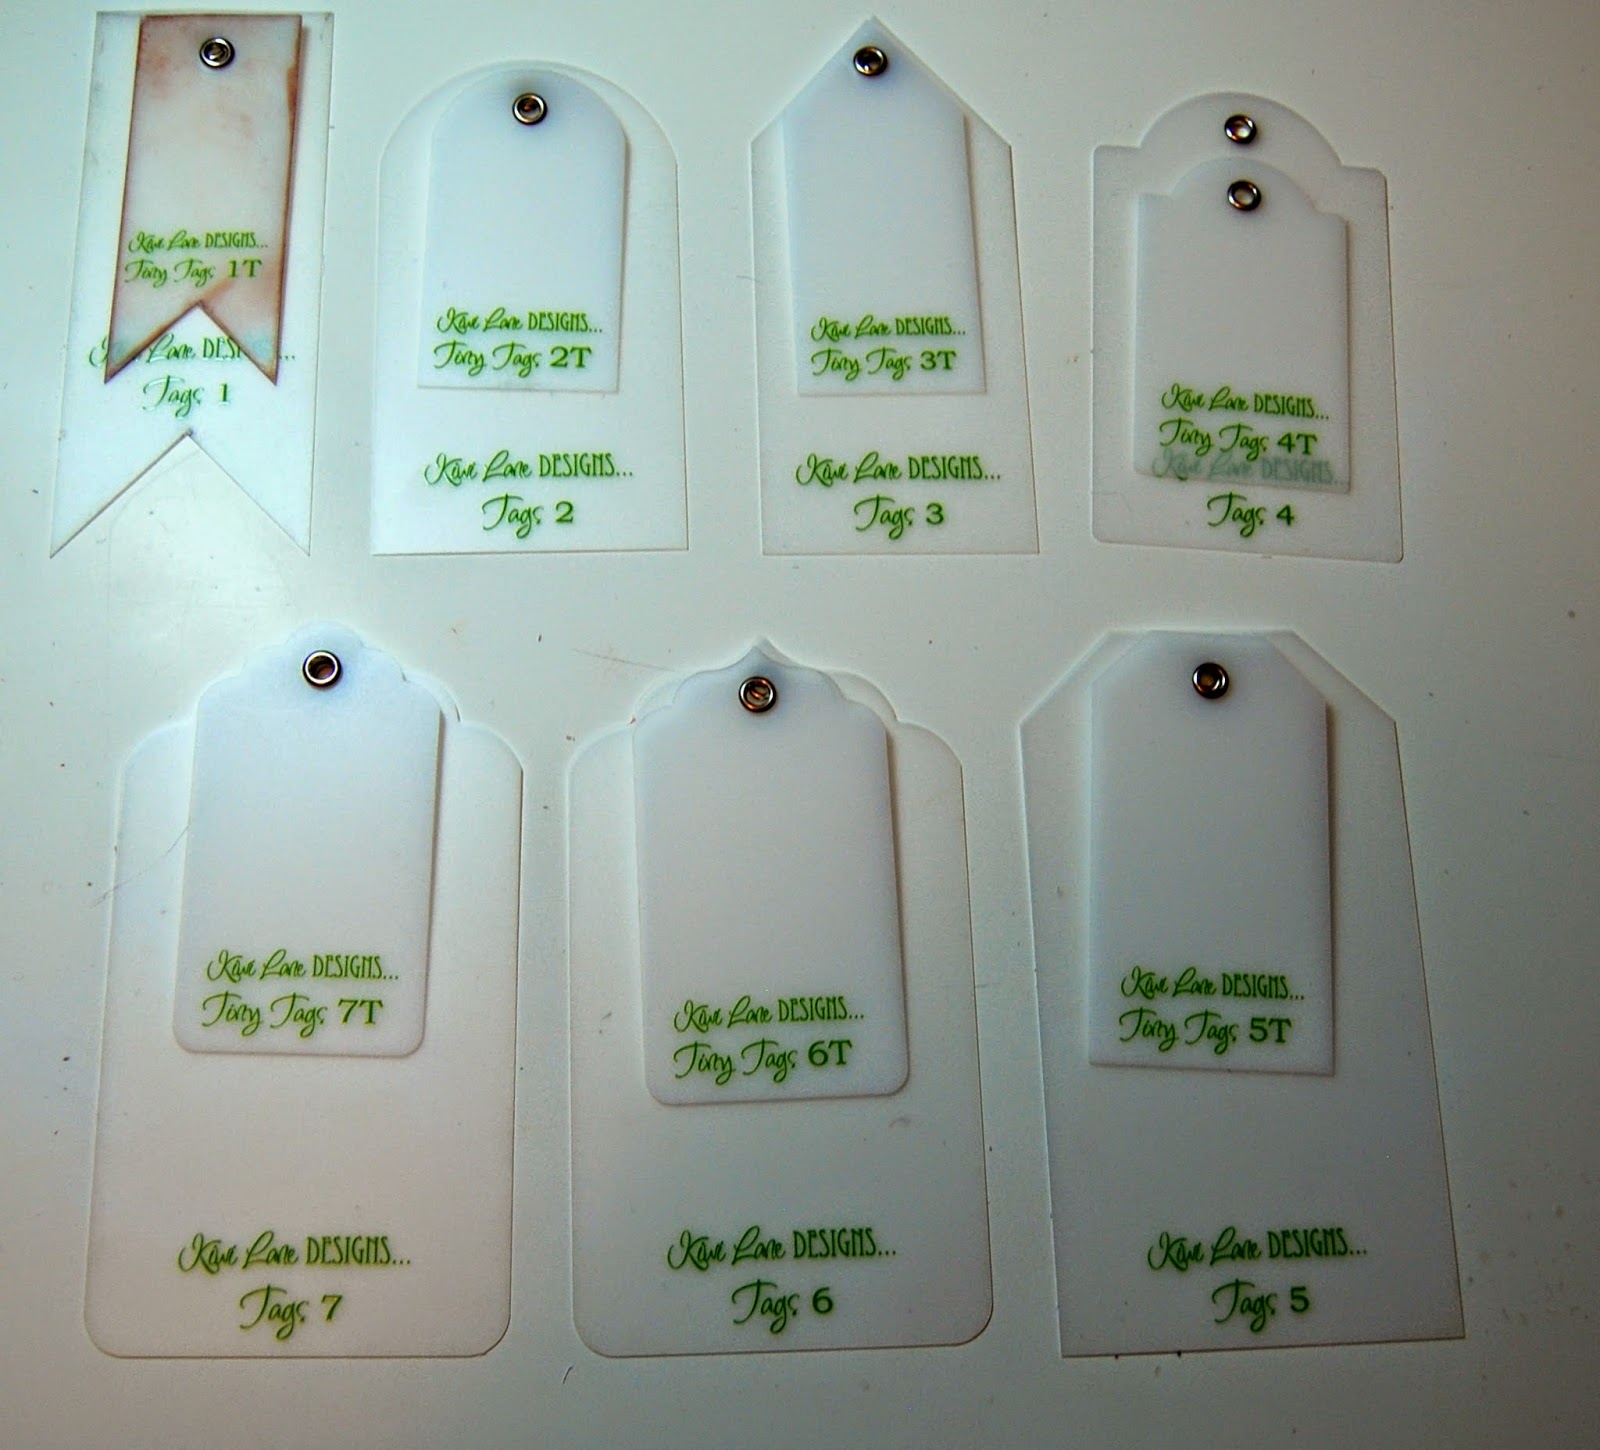
To show you how easy it is, here is how I went about creating my tags for this month's  blog project.  I'm going to show you all the tags i "thought" about using...but you'll soon notice that I didn't use all of them. But maybe you'll get an idea or two from the photo? 

Yes...for this photo I laid all the template out and took a picture.  Why?  Well, because I wasn't quite sure of which tag I wanted to use.  So better be prepared than have to go back and rework something later. 


 The next thing I did was I layered the smaller Tiny Tag Templates on Top of the Larger Tag Templates.  I thought by doing this I could see a better idea of what I wanted to do. (and yes, I know I need to clean my Tiny Tag Template 1...it's my most used! lol ) 


After I layered the Tiny Tag Templates onto the larger templates I decided that I would take the Tiny Holiday Designer Templates and layer those on top of each of the Templates to help me further along in my design. 


Since I still wasn't quite sure what I was going to do yet, but had some ideas, i decided that it was time to Trace and Cut out the Tags.  For my base I used Kraft Paper. I like using Kraft Paper because it goes with just about everything! 


Kraft Paper is really nice, but I wanted to add some texture to the tags to make them stand out a bit! So I then Embossed them. :0) 


After Embossing I always ink the edges....okay, so inked some of the Embossed Image too! 


After I finish Embossing and Inking it's now time to decorate!  
Here are the tags that I created. 

Tag 1. 


For this tag I used the Kiwi Lane Tag Template Number 6, The Scallop Border Number 1A, and the Tiny Holiday 1T. The paper I used for this Tag is from The Teresa Collins Fabrications Line.  The ribbon is from my stash as well as the alphabet stickers. 

Tag 2


This was a very easy Tag to make.  And it uses all of my favorites!  The Tags Templates I used are the Tags 1, the Tiny Tags 1. I also used  Scallop Border 1A, for the top of the tag.  And then there is the paper I used. (I actually used three of my favorite companies for my projects this month, two others in addition to Teresa Collins!)  For this project I used a little bit of the Authentique Joyous Collection (LOVE Authentique) and a little bit of My Mind's Eye (LOVE My Mind's Eye!) Together they made the tag perfect for me! (or for someone who is on my Christmas List). 

Tag 3. 


For Tag Number Three I used Tag Template Number 2 layered some beautiful paper (Teresa Collins) on it, and extended it in length about an inch.  (it needed to be longer) I added some lace to the top and bottom of the Fabrications Paper and then I created my Owl.  For the Owl I used the Autumn Template Number 5 and used different Sheets of paper from The Teresa Collin's Fabrication Line, added some pearls to her neckline and at the base and attached it to my tag. Almost forgot!  I also embossed the owl's face so that it wouldn't fade into the tag.

So I have three beautiful (to me) tags that I can use on gifts (or not!) Then I thought....l need a Christmas Card!  So I created a Christmas Card too! 
Simple, Easy, and Fast to make!  I used the Tiny Tag Template on this Card and cut it out of three different Papers from The Teresa Collins Fabrications Collection.  I love the look and it's easy to make so I can get all of my cards done fast.  (and quite possibly get them mailed out this year). 


So i hope you've enjoyed my projects for this month....and maybe, just maybe I've inspired someone to make some tags for Christmas! Gift Tags are fast and easy to make!  And EVERYONE loves them! 


Templates Used: 
Tags 1, 2 & 6 

Monday, October 13, 2014

Happy October!

Can you believe it's October already? 

Before I show you my new October Kiwi Lane Project I need to let you all know who the winner was of my September giveaway.  The winner is Tinad.  Tina, if you would email me directly at my email address (Jill_75013@yahoo.com) and let me know your Snail Mail address I will get the layout to you!  Congratulations!  I hope you enjoy it! :0) 

Now, on to October. 

This month I was had the opportunity to work with paper from Authentique! Authentique is my most favorite Paper Company!  Love Love Love Authentique! Seriously...how can you NOT love them? 

Here's my completed project! 


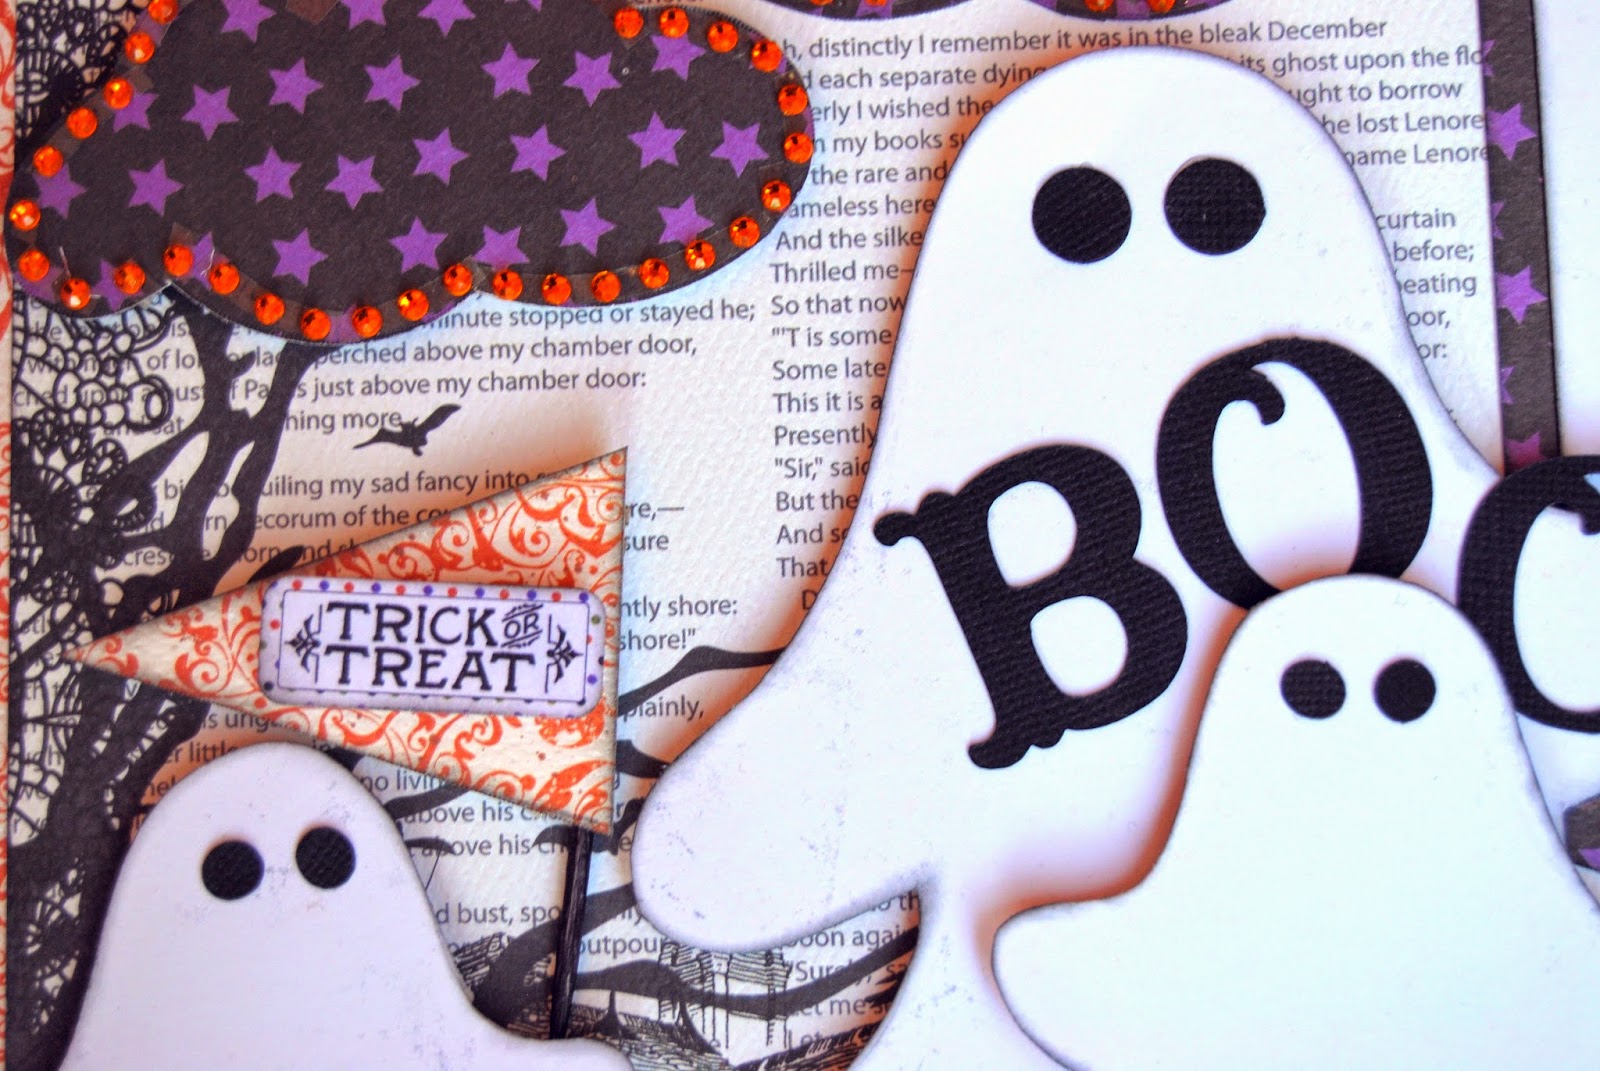
With Halloween Coming up at the end of the month it was perfect timing to play with the Spirited Collection of Halloween Paper from Authentique.  The paper assortment that I received had two pages that to me were really meant to be a "Base Page". By "Base Page" I mean I didn't want to use the Design Templates on it to cut it apart.  I wanted to use it as it was...and build my page onto it.  This meant that I was going to be using a LOT of Accessory Templates to design my page. 
  
I started by choosing which of the "Base Pages" I wanted to use for my layout (I decided on "Eerie" it's the page with the haunted house, tree, and writing). 


After I decided which one to use, I began to lay out the different Kiwi Lane Designer Templates that I wanted to use.  I always start a page with just a few templates...and eventually as the page goes along I add to it.  (and as the case may be I can take some away too!). 

Just a note.  That Pennant Template from the Kiwi Lane Designer Tag Template Collection is used a LOT, if you can't tell! lol.


I knew that there were some templates that I wanted to use for sure!  Like the new Delight Card Template Set, the Halloween Designer Template Set, and the Celebrate Designer Template Set

 The Celebrate Designer Template set has a "Cloud" Template (Celebrate 5) in it that I just HAD to use...and then since I used the BIG Cloud, I of course had to use the Smaller Cloud. (Celebrate 5t). The same had to be said for the Ghost...if I used the Big Ghost from the Halloween Designer Set (Template 1) I of course needed to use the Smaller Ghost from the Holiday Set (5t).  And so it began!  Big and Little that's how this page went for me.  


After cutting and adding to my page I of course added some Bling to set things off! Orange Bling this time...I wanted to match the paper that I was using and Orange seemed to fit! :0) I also added in a few buttons and some matching embroidery thread and the end result? A Boo-tiful Page! 


And the photo?  Well...that was the hard part for me.  All of my photos of earlier Halloween's have been scrapbooked.  So I found one of my daughter from one of her High School Football Boo-Bowl's (where the kids in the Band and ColorGuard and band get to wear Halloween Costumes to the game and perform in them during halftime).  Yes....she's dressed as a guy.  

Here's a list of the Templates that I used to create my page: 

Templates Used: 

I hope you like my project! Want to see more of Authentique Paper?  Go by there website, blog or visit and like them on Facebook! And don't forget!  Be sure to stop by the Kiwi Lane Designs Facebook Page Too!  There's always lots of inspiration there! 

Happy Halloween! 

Jill


Monday, September 15, 2014

It's a BEAUTIFUL Day!


How many times have you heard that?  A lot I bet!  But it really is a Beautiful Day for me because I get to show you my layout using Bella Blvd.!  And it will be an even MORE Beautiful day for someone out there! 


This month I had the opportunity to work with Bella Blvd.  I LOVE Bella Blvd., and you should too! Bella Blvd. has LOTS of fun paper in beautiful bright, cheery colors! When I opened my package I thought to myself, "this is going to be a HAPPY layout!"  and it is!  The Molly Collection is perfect for creating pages for Girls (both little and big!)  My plan was to create a FUN layout of my daughter and her best friend.  And that's what I did, or at least what I started to do. 

Here are the FUN Papers that I worked with this month! 


When I begin a scrapbook page I'm really never intending it to be a two pager...it usually starts out as a one page layout....(here's what it looks like in the beginning)


But after I have the first page all out on paper I begin to wonder what it would look like as a two page layout and well, things start to take off!  You'll see the end result in a few minutes! 

Along with the Molly Collection I also used Clara Lane Design Template Collection from Kiwi Lane, along with the Rings.  The Rings are super fun to use!  I made photo mats out of mine, and used the Clara Lane mainly for the borders.  And of course I used my favorite template of all, the Scallop, to add a little bit of character to the pages.  I'm the type of Scrapbooker who thinks that a Scallop can be used on every page you create.  

Here's my final layout...and yes, it turned out to be a two page layout! 


As you can see from my layout I used the Clara Lane Template as the main Border Template for my page.  I just cut the width of the border in different sizes.  Also when I was using the Scallop Border, I tried to use the "words" in the Bella Blvd. paper as a guide.  I wanted the words to be shown in the page and not have them cut off so that you couldn't read what they were saying.  Since the background paper included flowers I had to use one of the flowers from the  Kiwi Lane Accent Collection to add as an embellishment to my page.  Along with my added ink and the usual rhinestones I REALLY like the way my page turned out.  

If you'd like to re-create my layout, here are the Kiwi Lane Templates that I used to create it: 
Templates Used: 

Be sure to stop by and say "Hello" to Bella Blvd. on Facebook! Stop by there Blog for MORE inspiration! OR, stop by and their Site to see ALL the Beautiful Bella Blvd. Products! 

So did you notice that there aren't any photos on my Layout?  Well that's because I've decided to give it away to one lucky winner. Now...here's the deal.  September is a Special Month for me, my birthday is in September.  And well, I thought I'd like to brighten someone's day. SO how would you like to be chosen to receive this page as a gift from me to you?  All you have to do is leave a comment here on my personal blog!  You have until September 30, 2014 to leave a comment. and a winner will be chosen on October 1st!  
Oh...and P.S.  My Birthday...it's the 21st! :0)


Have a GREAT Day!

Jill :0)